Showing posts with label linux. Show all posts

Saturday, February 24, 2018

Building a Reclaimed Kubernetes Cluster

Thanks to family hand-me-downs, over the passing years I have become a repository of unwanted laptops. Some of them barely boot anymore, but three-quarters of them have two cores and 2 GB of RAM or more. One actually had four cores and 8 GB of RAM... making it a veritable workhorse. I could make them disposable workstations, but instead I wove them together and created a personal Kubernetes cluster.

The base OS for the nodes is Ubuntu's latest LTS release. Rather than using Conjure on MaaS to set up the cluster (which required an isolated network for bootp and DNS and meh), I leveraged Kubespray's flurry of Ansible scripts to prep an inventory of machines over SSH. This ended up being surprisingly low impact and worked perfectly for the use case of building a test lab with piecemeal hardware.

Laptops work just fine as server nodes with a few tweaks:
  • Even if you use the server distribution of Ubuntu, laptop events such as closing the lid will still result in a suspend/hibernate/resume action. Edit /etc/systemd/logind.conf to make sure the laptop keeps running when closed:
    sudo vi /etc/systemd/logind.conf
    HandleLidSwitch=ignore
    sudo service systemd-logind restart
  • The display will remain on once you start ignoring LidSwitch events - run a script at startup to turn the display off and save energy.
  • Even if you are running in console mode, NVIDIA Optimus laptops will go nuts and seemingly run the discrete and on-chip GPUs nonstop, overheating the machine. Install Ubuntu's Bumblebee packages to prevent this:
    sudo apt-get install bumblebee bumblebee-nvidia primus linux-headers-generic
  • As with all Kubernetes nodes, disable swap by commenting out the partition in /etc/fstab. Since you will no longer need to resume from hibernate mode on the laptop, it can be safely disabled

Once you have the laptops prepped and the latest updates applied, you will need to make sure each node has a copy of python-netaddr installed: sudo apt-get install python-netaddr Ansible issues its commands over SSH, so ensure you have keyfile-based authentication set up from the machine you will be running Kubespray on to each of the nodes. If you don't already have an SSH key generated (for example, if you will run Kubespray on the master node), then you can generate a passwordless one via ssh-keygen. After that, copy the public key to each node with:

ssh-copy-id node1
ssh-copy-id node2
...

After that, the machine you are running Kubespray on will need Ansible installed. I ran Kubespray on the master node to keep things simple - so on that Ubuntu box I issued:

sudo apt-add-repository ppa:ansible/ansible
sudo apt-get update
sudo apt-get install ansible
git clone https://github.com/kubernetes-incubator/kubespray.git
cp -rfp inventory/sample inventory/mycluster

This will:
  1. Install Ansible on the box
  2. Download the Ansible scripts from Kubespray
  3. Creates a new Ansible inventory called "mycluster" that is a clone of the Kubespray sample
An important thing to remember is that you address nodes by straight IP address - not by hostname. This is especially important with Ansible scripts because the node's hostname may well change as part of the installation process. If your nodes are fetching their IP address via a DHCP server, ensure the DHCP server has static IP allocations for your nodes.

Once you have all the IP addresses for your nodes, set them in your inventory file. An easy way to do this at the command line is:

declare -a IPS=(192.168.1.32 192.168.1.36 192.168.1.40)
CONFIG_FILE=inventory/mycluster/hosts.ini python3 contrib/inventory_builder/inventory.py ${IPS[@]}


Verify the inventory is correct by cracking open inventory/mycluster/hosts.ini - if you want to change hostnames, now is the time.

I would recommend having Kubespray build a kubectl configuration file automagically for you. To have this generated as an artifact, change inventory/mycluster/group_vars/k8s-cluster.yml to have the following entry set: kubeconfig_localhost: true After these tweaks you should be ready to launch Kubespray's Ansible playbook. Note that Ubuntu's convention is to have you operate as a normal user and sudo all of your commands, so you will need to use Ansible's --become parameter:

ansible-playbook -i inventory/mycluster/hosts.ini cluster.yml --ask-become-pass --become


At this point Kubespray will try its best to get a cluster up and running on the nodes specified in your inventory file. At the very end Kubespray will provide you with a kubectl configuration file in artifacts/admin.conf, which you can then copy or merge into another workstation's ~/.kube/config file.
Once you have the Kubernets configuration file set on your workstation, you can use it to fetch an authtoken to get into the Kubernetes Dashboard. The proper way to do this is to generate a new system secret that has the appropriate permissions to interrogate the running cluster... but the lazy way is to just steal the token used by Kubernetes' namespace controller.

I'm lazy, so first I list all the secretes in the kube-system namespace:

kubectl -n kube-system get secrets

And then fetch the token for the namespace controller:

kubectl -n kube-system describe secret namespace-controller-token-???

So that I can use it to login to the web dashboard:

kubectl proxy &
http://localhost:8001/api/v1/namespaces/kube-system/services/https:kubernetes-dashboard:/proxy/#!/login

Now you should have a working cluster you can mess with!

So that the laptops were properly ventilated, I placed each vertically into a metal document sorter from an office supply store. This gives me a nifty vertical rack for the laptops that has plenty of air circulation and allows me to route cables out of the way.

I've constructed one weird frakencluster - but it works!

Thursday, December 15, 2016

Arcade Addiction

Ah, who can forget playing Pac-Man at the Pizza Hut. Or Joust waiting for a pizza at Noble Roman's. Or DigDug at Pizza King. Come to think of it... I ate a lot of pizza as a kid.

Fast forward to Christmas of 2014 - I purchased a arcade cocktail cabinet from Rec Room Masters. After it was assembled in Ikea-like fashion I mounted an old monitor, discarded 2.1 speakers and an Raspberry Pi 3 inside of the chassis. Nifty.

One oddity was that I didn't want to shell out all the cash for every single button in a panel... so I needed a cap for each remaining hole. Luckily I had access to a 3D printer, so was able to remix a hole cap on Thingiverse and print black caps to fill the gaps.

I wanted the Raspberry Pi to sit a bit out of the way, so I screwed it into the VESA mount that the monitor rested on. After sawing an Adafruit perma-protoboard in half I was able to craft some custom headers that allow ribbon cables to connect from the Raspberry Pi and join with header posts for the joystick pins and buttons. This allowed for much better cable management and room for the subwoofer & speakers underneath.

I wasn't interested in installing a coin door on one side - so I kept it wide open and instead had the cabinet door facing the center of the room. Little had I expected that cats would LOVE climbing in the open gap of the cabinet... and ripping cables off my Pi. I shoved the open side against the wall - allowing the extension cord to conveniently poke through - and now the only access is through the swinging door on the opposite side.

On the software side, joysticks and buttons are mapped through mk_arcade_joystick_rpi, an archaically named but amazingly useful module that allows GPIO pins to become joystick inputs recognized by Linux. It took some work in order to have libretro recognize these buttons; many of them had to be remapped. However, libretro quickly became my go-to MAME emulator and now supports controls on both sides of the cocktail cabinet.

I had to perform some slight modifications to the RetroPie display setup to rotate the screen 90˚, but luckily so many cocktail cabinet titles were programmed for this 4:3 aspect ratio. Titles are working flawlessly now, and I can host two-player action by flipping a few emulated dip switches.

One thing I found interesting was how MAME distributions were entirely dependent on the exact name of your zip file. In addition, each ZIP was a true manifestation of the on-board arcade ROMs - in that sometimes a US distribution or second edition game actually piggybacked on top of a previous ROM. In this same way, two ZIPs were sometimes required to run a single title: one for the older ROM, one for the later version. I ended up combining the two ZIP archives into a single one - in this way older ROM images were still injected as a dependency, while the ZIP name was that of the older title and was still executed correctly.

Pizza night at the household now takes on an entirely new meeting. A few slices and a frosty beverage helps me appreciate Ms. Pac-Man in a whole new light.

Wednesday, October 07, 2015

Raspberry Pi Finally Conquers Userland

Raspberry Pi developers have had quite a coup on their hands this past few weeks. The "official" Raspberry Pi Linux distribution Raspian was just upgraded to Debian 8, or "Jessie." This provides a huge number of wins - the 4.1 release of the Linux kernel, latest glibc and build chain updates, more native packages (like Node.JS and wiringPi), and device trees. Oh, sweet device trees.

While the current Raspian distribution still relies on wiringPi 2.24, the most recent 2.29 version has a much nicer way of addressing GPIO in userspace by exposing the GPIO ports in /dev/gpiomem. All too often Raspberry Pi developers run GPIO apps as root to access the array of general purpose I/O pins, however this leads to all the lovely security holes and vulnerabilities that privileged access brings. You never want Apache or Python or any user-created apps running as root - so instead you must find a way to export these ports and allow unprivileged users to access them. Traditionally this has been done using wiringPi's export utility, however the latest gpiomem exposure seems to be much cleaner.

With Jessie I've been able to significantly cut the complexity of installing Garage Security and Sprinkler Switch. I don't need to manually install wiringPi, Node.JS, Video4Linux and a number of other packages. Things seem to largely "just work" as one might expect of a modern distro. One example is that Motion has been updated and appears to be pre-packaged on Raspian, and the necessary Video4Linux bcm2835-v4l2 kernel module properly creates a /dev/video0 device. CPU utilization appears to be much lower with the current stack, and it appears that I can just tweak Motion's configs to save videos in an HTML 5-friendly way rather than transcoding them with a script.

Garage Security and Sprinker Switch are being updated now for Jessie and testing is underway... the new Jessie builds are looking very promising so far.

Monday, January 05, 2015

Telling a Tale for Ten Years

Exactly ten years ago I started this ridiculous blog as a way to collaborate with other game developers. At the time I thought I would dig deep and push out at least one title. This eventually led to the "Desktop Distractions" studio concept, and the nascent title Deskblocks. I also worked within the CrystalSpace engine as an entrant to the PlaneShift team. I just couldn't give these projects traction however, so I gave it up and moved on to tinkering.

Even though the driving force behind the blog had faded away, and even though no one else reads this blog (aside from the State of .NET Integration Frameworks post), I kept updating it. Writing - even if it exists only for your own edification - really does help with communication and critical thinking regardless of what you write about. Even though my day job has nothing to do with garage door openers, my posts on my garage door security system helped me organize the build in a way that informed the Hack Clock project. Back in 2006 I began investigating vector processing, and the resulting frameworks have helped me think about and design microservice architectures. Of course, there was plenty of venting as well with my favorite software companies being dissolved or SuSE Linux winning and failing and winning and failing again. All of this writing helped me when performing comparative analysis at work, or designing parallel architectures, or watching trends in software development.

It is hard to believe a decade has slipped by. It doesn't even seem real. I don't think I've evolved much since that one cram session in a crystal chair, but I'm glad to have my collected ramblings to reflect back on.

Tuesday, March 11, 2014

It's a Basement, not a Swimming Pool

Second up on my paranoia list is my basement slowly filling with water. My paranoia is founded in a rich history of failed sump pumps, broken water mains and power outages. I can mitigate some of my worries by installing a backup, non-electric Venturi aspirator and a die-cast primary sump pump - however anything mechanical can break. I believe in nothing anymore.

A Raspberry Pi can help satiate most of my neurosis, including this one. Using a Honeywell HumidIcon Digital Humidity/Temperature Sensor and a Maxbotix Ultrasonic Range Finder I can monitor basement humidity, temperature and sump well levels.

My first component to integrate was the range finder. The Maxbotix LV-EZ4 can operate in one of two modes - either providing an ASCII representation of the range using RS232 serial communication or using an analog voltage. I dorked around with two possible ways of using this - feeding an analog signal through an Adafruit Trinket and have the values translated into an I2C signal. However - I had a 5v Trinket - and even with constructing voltage dividers I couldn't quite coordinate the right voltages to negotiate with the Pi. I punted and used the serial port from the LV-EZ4, however the Pi uses UART and so I had to create a logic inverter using a recycled NPN transistor. Once I inverted the signals from the range finder, the Pi was able to read the inbound ASCII representation of the range.

After I had the range finder working, I used Sparkfun's Honeywell breakout board via I2C to communicate temperature and humidity to the Pi. Both the range finder and the breakout board fit nicely on a mini breadboard, sharing voltage and ground while splitting out I2C data, clock and RS232 data feeds. Once permissions were correctly set and kernel modules loaded, things appeared to be working nicely.

I wanted to save the range finder from water splashes, or at least slow its eventual decay. I re-used the case from the SD card I purchased for the Raspberry Pi, cutting out holes for the extrusions in the range finder board. Corners were then covered in electrical tape, and the seams were covered in hot glue. No, it's not pretty. No, it may not add to the LV-EZ4's lifespan. It was at least worth a shot however, and I've added a bit of crush/drop protection.

Everything is hooked into a Raspberry Pi Model A, just to save a few bucks. For an enclosure I ripped apart an old Netgear wireless access point, which easily housed the mini breadboard and the Pi. I decided to try things out but stumbled upon an unsettling fact... there are no power outlets near the sump pump well. Undeterred, I went looking for any long length of wire and found twenty feet of RJ11 telephone cable. It had four total wires - which would be more than enough to carry voltage, ground and signal wires. I sloppily spliced the wire, soldered it onto three jumpers, attached one side to the breadboard and another to the range finder. To my surprise - it actually worked. I was able to string the range finder all the way across the room, which also made ambient humidity readings more accurate.

In much the same way as I created the Bottle application for the garage door security monitor, I created a Bottle app to host REST APIs and display the well depth, temperature and humidity as well as allow Jabber (e.g. Google Talk) clients to request the status of the well and the climate. It all is working well so far, however I still need to tweak the Honeywell I2C code to make sure the component re-samples conditions at every request. Right now it is just fetching the currently stored values.

Right now the range finder is resting atop the sump pump well and is just waiting for the upcoming rains. My eventual goal is to create a home dashboard that aggregates all sensor data from around the house: sump pump well depth, basement temperature and humidity from the Basement Monitor APIs, ground-level temperature and humidity from a Nest thermostat, garage door state and camera feeds from the Garage Security APIs and maybe even power data from an attached APC UPS. The Bottle apps would then work to expose sensor data as REST APIs, and a more powerful Play application would serve the user interface, archive historical data, provide alerts and indicate trends.

Sunday, November 03, 2013

Retrospective: The Raspberry Pi Garage Door Remote + Security System

My rinky-dinky garage security system is now online and in operational use. I still have more tweaks to do - for example, I got rid of the metal backplane within the My Book casing that now serves as my board enclosure because it shielded my WiFi signal, killing the network connection. I'm sure I will continue to tweak the Motion configs to increase framerates and decrease sensitivity. Now that e-mail notifications are working, hopefully I can limit the spurious notifications and just notify on the bigger changes of motion over two seconds in length.

Another measure of success is cost; if I could have purchased a ready-made setup for a marginal increase in cost, it may be better to go with a commercial platform. If the build is overkill and I could have built it with cheaper components, I should scrap this and re-build. Looking at commercial options I couldn't find anything that had both the garage door functionality and the security camera... just one or the other. Chamberlain does sell the MyQ Garage, a pretty nifty home automation product that contains a universal garage door opener and a tilt sensor that is WiFi-enabled and can be paired with a smartphone app. They also sell the MyQ Internet Connectivity Kit, which is more of an Internet-enabled garage door master controller. Neither have a security camera paired with it, but you could easily install a wireless camera separately for around $40. The MyQ solutions are $140 and $120 respectively, giving you a total build cost of $160-$180. Not bad, really.

If you bought every part new, the build list for my lil' setup is:
Raspberry Pi B $40
USB Micro-B cable $2
USB AC Adapter $5
8GB Class10 SD Card $8
802.11n USB dongle $9
Parts for MOSFET switch $5
Universal garage door opener $25
HP HD-3100 webcam $14
Enclosure made of random stuff $0
Total $108

I had most of these parts on-hand, so my actual cost was closer to $70. That means a savings of $90 over a commercial solution. I don't know of a cheaper solution than the Raspberry Pi that could handle a 1280x720 webcam feed and perform motion detection, and a $14 webcam is cheaper than Raspberry Pi's own camera expansion card.

Of course, your time isn't free. The hours spent in construction count - so I tried to estimate how long each step took me:
Tearing down & wiring up garage remote 1 hour
Setting up webcam and Motion 2 hours
Configuring OS & system administration 4 hours
Building web interface 3 hours
Building enclosure 2 hours

All told maybe 12 hours of work, a quarter of which was me figuring out how to render an MJPEG stream on an HTML5 canvas. The web interface can be re-used, as are the system administration steps, so I could probably do another in four hours or so. Four hours and $70 isn't too bad for peace of mind.

Speaking of ease of mind, I'll leave this thread with an ad for Chamberlain's MyQ Garage. I thought I was bad... but these actors have turned garage door anxiety into an existential crisis.

Friday, November 01, 2013

Shutting the Door; Finishing Up the Raspberry Pi Security Camera + Garage Opener Remote

I'm going to be tinkering with this new security camera / Internet-enabled garage door opener for some time... I imagine I'll add environmental monitoring and perhaps even hook it up to the sprinkler system. Even with future expansion in mind, I needed to shield the Raspberry Pi and the remote control board from dust and stray water. The mini protoboard I would likely keep as opposed to soldering a more permanent board, since I wanted the ability to dork around with the GPIO pins that have pull-down resistors built in and possibly add additional controls.

I had an old Western Digital My Book sitting around with a defunct hard drive, and it appeared to be nearly the right size to house the Raspberry Pi, the garage remote board and a mini breadboard. I decided to gut it and use the housing as an enclosure. I found a few motherboard standoffs in my toolbox, and uses those to keep both boards a few centimeters off of the metal backplate. The drive and controller itself I shelved.

Once I had everything stripped apart, the garage remote was mounted on one side of the board and the Raspberry Pi was mounted on the other. It was a tight fit, but I was able to get the webcam plugged in, the mini breadboard slid in and all the wiring completed within the confines of an old My Book chassis. Using a very technical device I call a "hacksaw," I removed some of the side wall of the enclosure so I could pull out the micro-usb cable for power and bring the webcam so it can be positioned independently.

In the end everything didn't quite fit... the garage remote is bursting out of its seam. However the general look of the device is far better than it was before. The unit is now back sitting on a shelf in the garage, quite content.

I still have some continued tweaks to do, but I think I've now addressed the root question: "is the garage door up?"

Thursday, October 31, 2013

Who Moved My Barn Door?

I really need to stop it with the "Barn Door" titles.

So I now have wired a Raspberry Pi to a garage door remote, created a primitive web interface for it, and attempted some security and stabilization for the supporting applications. Now I am moving on to sending an e-mail with photo attachments of security events that have occurred.

Setting up the mail server within the Ubuntu distribution was a bit of a pain. The Pi can't act as an MTA all on its own thanks to all the relay rules in place across the Interwebs, so instead I had the default exim4 installation route through GMail. I wasn't interested in installing yet another outbound mail system; I would rather leverage what comes packaged by default. I ensured I deployed an application-specific password for exim4, then followed the very helpful instructions from Debian on how to hook it all up with GMail as the outbound SMTP relay.

The default mailutils will not send attachments over e-mail, so instead I installed mutt for a command-line mail client. I can issue e-mails via:
echo "Motion was detected" | mutt -s "Garage Security System" -a /srv/motion/23-20131030184606-00.avi -- somedude@gmail.egg

Once combined with Motion's External Commands, I can build scripts that e-mail off movie files as soon as they end. The mpeg4 format appears to work natively within Android, so video snippets are easy to view once they are e-mailed out.

Now for some polish; I need to construct/find an enclosure and finish the front-end user interface.

Wednesday, October 30, 2013

Your Barn Door is On Display

After I buttressed the Pi as best as I could, I constructed a simple webapp to allow users to view the security cam feed and activate the button on the garage remote. It was surprisingly straight-forward to render an MJPEG feed on an HTML5 canvas, but it took a bit more doings to expose GPIO as a minimal REST call.

Before I could deploy the webapp a few additional packages needed to be deployed for Python to access everything:
  1. Installed python-distribute so we can use Python's easy_install
  2. Installed pip using easy_install (how meta) so we can easily install application dependencies
  3. Installed libapache2-mod-wsgi to permit Apache to act as a Python application server
  4. Cloned the GarageSecurity repository, which includes the Bottle webapp and some admin configs/scripts
  5. Installed GarageSecurity's dependencies using pip install -r pip_requirements.txt
  6. Allowed www-data to access the GPIO port using the WiringPi utility

One big condition I held was that the webapp should not be granted root access, even if it was indirect access with a setuid script. The WiringPi utilities allow one to create GPIO devices handles that can be accessed by an unprivileged user such as www-data. By adding an entry within /etc/rc.local for the WiringPi utility the devices will be created on boot for use by a user within the gpio group. The WiringPi Python libraries then use these devices to control the GPIO pins. This took a few hours of experimentation, and a huge amount of thanks go to Sebastian Österlund's WiringPi post for helping me figure this out.

One could use a REST framework such as WebIOPi to expose GPIO access over a REST interface, but it looked like this implementation needed privilaged access and the webapp didn't require 99% of the features that WebIOPi ships with. Instead, I leveraged Bottle to expose the WiringPi library as a REST call, which permits a client-side application to issue a remote call and active the garage door remote.

The MJPEG stream provided by Motion for the camera was only bound to the localhost interface, however I proxied it through Apache for external exposure. Multipart MJPEG streams are not directly supported by many browsers anymore; instead it is fairly straightforward exercise to have JavaScript functions fetch the stream and then paint the images directly onto an HTML5 canvas. This surprisingly just took eight lines of JavaScript to accomplish; it took me more time to figure out how to scale the viewport and a button for mobile devices than it took to render the webcam feed.

I know I'm definitely not early to the garage door hacking scene - there are several other projects using Arduino with mobile front-ends, some adapted to use the Raspberry Pi with relays, others with wireless interfaces and mobile webapps. I'm a bit partial to this approach because it has a fairly low part count (one resistor, one MOSFET, some wire, a mini breadboard, one universal garage door remote, a cheap webcam and a Raspberry Pi), it doesn't use relays and the web application does not require privilaged access to low-level resources.

Feel free to check out the evolving webapp - it is now managed under GitHub at http://github.com/deckerego/GarageSecurity/. I will continue tweaking it a bit and eventually fitting it with some sort of user interface, but I also want to move along and use Motion's External Commands to e-mail me whenever it detects motion. Unfortunately HP's HD-3110 has an auto-focus that keeps kicking on and registering as a motion event, so I might dig deeper to see how to disable the feature. Of course I still need an enclosure as well... right now bare wire and board are just sitting out on a shelf. One stray squirt gun and all is lost.

Tuesday, October 29, 2013

Your Barn Door is Off Its Hinges

I was a bit hasty when I said the next step in building the garage door security camera was constructing a web interface. As any good DevOps guy should know, getting the administrative portions of the host in stable shape is really the next step. I needed to deal with disk space issues, data retention, security and properly setting timezones.

The majority of my tweakings are being recorded within GitHub's GarageSecurity admin folder until I refactor that away. This folder includes config files and modifications that reflect the steps that I took to lock things down, including:
  1. Set the timezone to be local instead of UTC
  2. Build and enforce firewall rules
  3. Ensure that Motion's HTTP Configuration endpoints are disabled
  4. Hide the webcam's MJPEG stream behind an Apache2 proxy
  5. Allow Samba/Apache2 to list the recordings on the LAN
  6. Use an NFS mount instead of local storage for recordings (instead of using a 64 GB compact flash card, use a 2 TB NAS drive
  7. Create a crontab entry to compress & archive yesterday's recordings
  8. Allow userlevel (not root) access to Raspberry Pi's GPIO pins

The timezone issue is more a matter of personal taste. I would rather the time on the server reflect local time, since I will be looking at file timestamps quite frequently. Others may fall in love with UTC. Or Swatch Internet time. Whatever floats your boat. I did notice that tzselect does not appear to persist across reboots; instead I had to use dpkg-reconfigure tzdata.

The primary goal was to secure access to the webcam feed and disallow unauthorized access. Since this is an Ubuntu distribution, I used the Uncomplicated Firewall to only permit traffic across HTTP and SSH ports. This would close the default webcam and control ports that could be exposed by Motion, as well as other running services. The control endpoints were not needed for my purposes, and I'd rather not assume the risk of arbitrary file access. I still wanted to have access to the MJPEG feed coming from Motion... however I wanted the ability to lock it down. In order to provide more granular security controls I proxed the 8081 webcam port from Motion behind Apache2's mod_proxy, where I could define whatever controls I liked within the Apache VirtualHost. Likewise I allowed authenticated users to view the list of recordings using Apache's directory index module so that archived images and recordings could be easily accessed.

Once Motion was appropriately locked down, I moved on to dealing with file storage and archival. Instead of writing to the local SD card, I decided to make an NFS4 mount to a NAS server on the LAN. The amount of file I/O could easily be delt with over 802.11n, and the SAN could also assume the duties of archiving/compressing the files on a daily basis. This keeps the number of files on the mount much lower, allows for greater storage and doesn't wear out the SD card nearly as much. One catch was that the mount was occurring over a wireless interface, so an attempt to mount the filesystem too early would cause the boot process to lock up. I worked around this by using the mount options soft,bg,timeo=14,intr to decrease the operation timeout and allow for retries in the background. By the time the boot processes is complete, a retry operation should be able to successfully mount the drive.

The final security point is one that will be of much greater use once the web interface is written. The RPi.GPIO libraries write to /dev/mem, which means they need root access to work. Rather than grant scripts root access to /dev/mem (which is horrible practice), I enlisted the help of Gordon Henderson's WiringPi project. There are two parts to this implementation: one is the GPIO utility that helps create userspace devices for GPIO control, and the other is the Python library that can access these devices. I created an entry in rc.local that creates a device for GPIO17 in output mode that is accessible by www-data, which in turn can be accessed within a Python script running as the www-data user.

The security is definitely not exhaustive, but it's a solid start to get things rolling. From here I should be able to deploy a web application that exists as the sole entry point for the garage security system, and access controls can be entirely managed through Apache. A rogue user should hopefully be contained within the scope of the www-data user.

Friday, October 25, 2013

Your Barn Door is Closed

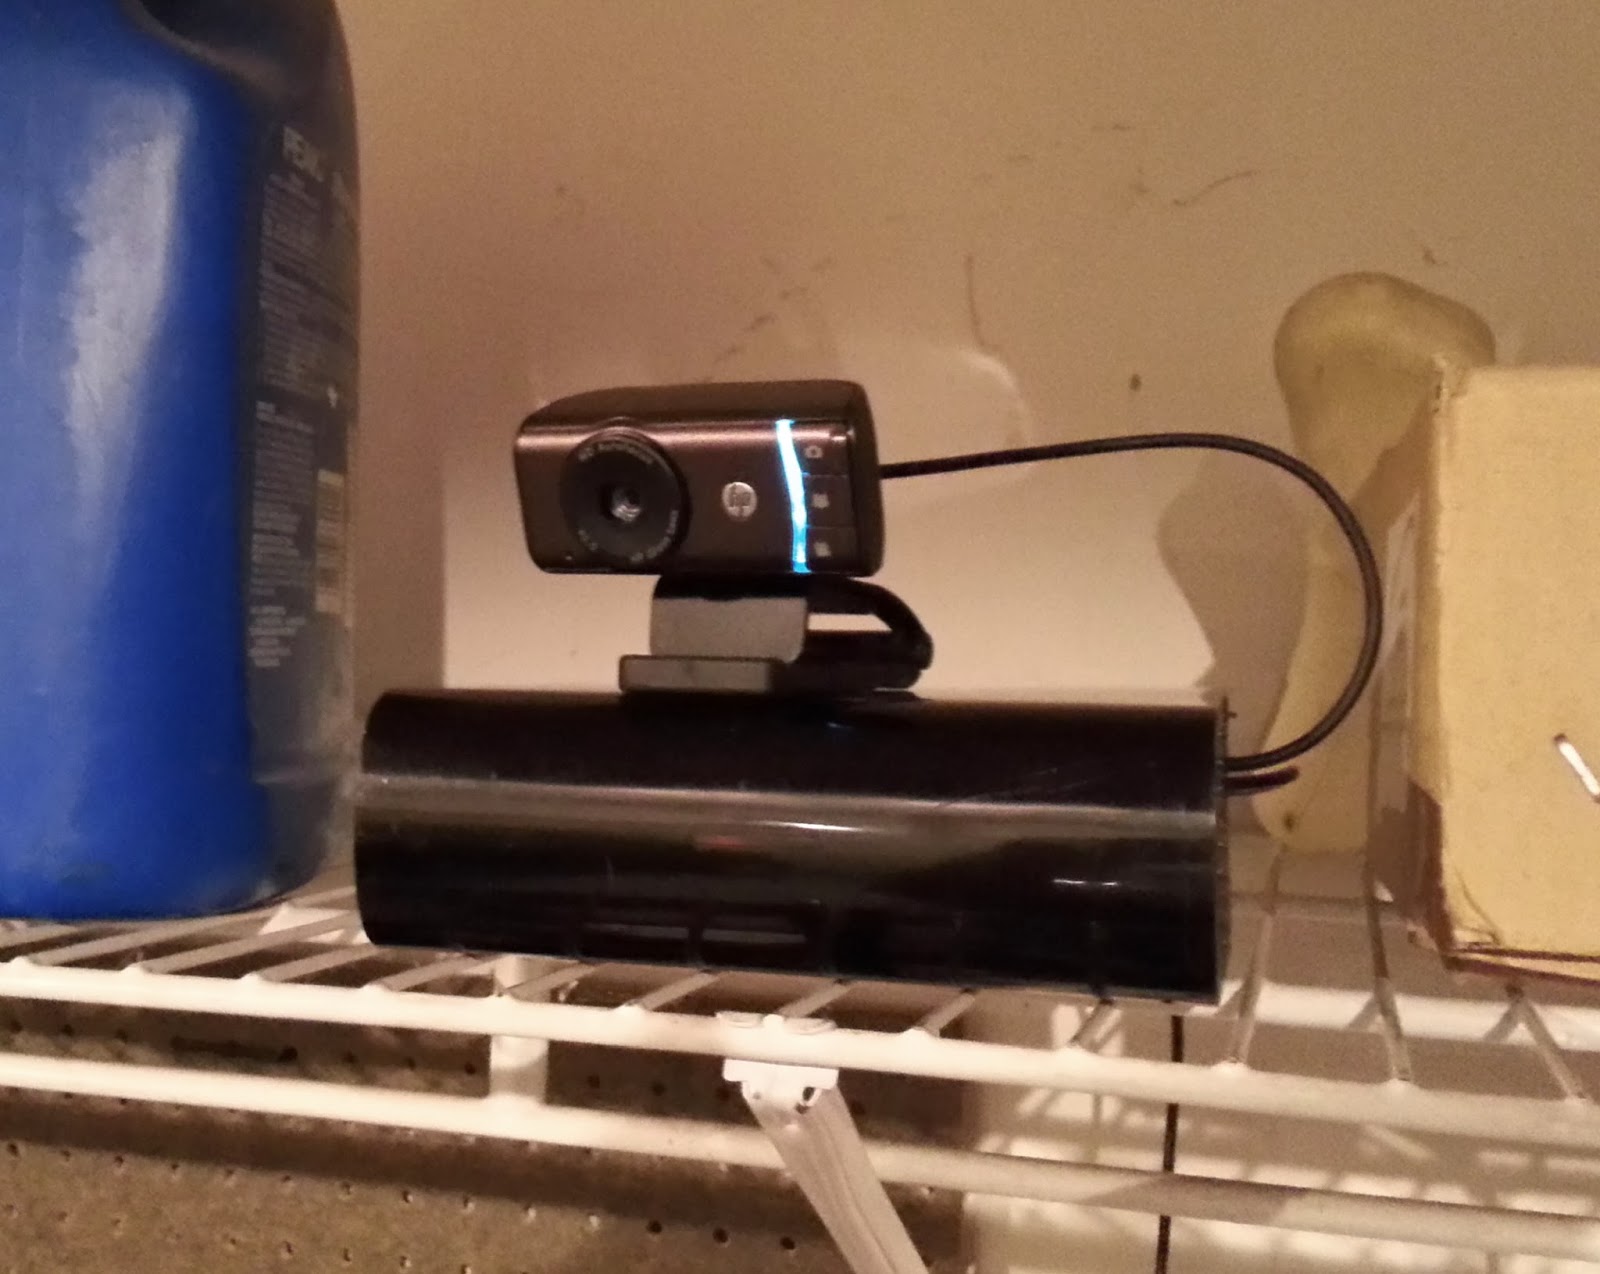
I added the security camera functionality to the Raspberry Pi I've been working on, using an inexpensive HP Webcam HD-3110 and the Motion subsystem. Both worked out of the box using the Raspberry Pi and the default (but upgraded to latest) NOOBS installation. Neither had an issue, and I was up and running with a security camera quickly. Another nice thing about Motion is that it exposes several external commands as a means to provide API exposure... so I can integrate a web application or send an e-mail at the start of an event. It would be great to send an e-mail whenever motion is detected, and send the video or photos related to the event.

Once the security camera was working and stable, I added back in the GPIO garage door opener remote that I hacked together. Working together, I now have a security system for the garage that can open and close the garage door from any vantage point. I deployed it up on a shelf, next to the windshield wiper fluid, where the webcam would have a nice perch.

I whipped together a quick Python script that would briefly engage the GPIO pin on the Raspberry Pi, so now I can sit at my laptop and watch the garage door go up and down. Ultimately I will place this feature behind a web application for ease of use. The Python support for Raspberry Pi seems to be a first-class citizen, so I might use Bottle to create a minimalist webapp for exposing the webcam feed and garage door controls.


I still need to build an enclosure... and perhaps upgrade the camera to one without an infrared filter and an array of IR LEDs. The web interface will be the next thing on the docket however.

Tuesday, October 22, 2013

Your Barn Door is Open

One compulsive behavior I can't seem to shake is the fear that I have left the garage door open. I count the squares on the front, I measure the light and shadows, I obsess. To tell the truth, even if I had a magic device that would send me a message every time the garage door opened or shut, I wouldn't trust it. I have to see it.

To feed my neurosis, I began working on a combo surveillance camera / garage door controller with an Internet interface. The first thing I attempted to get working was the method of opening the garage door; up to this point it seems like most efforts have been using a relay to close the switch of the hard-wired "big button" for the garage door opener. I wanted to have the freedom to place the device anywhere I wish, not unlike the garage door keypad that comes with most openers now. A spare Chamberlain universal remote was just sitting in my garage, so I decided to shuck it and rip out the logic board within.

The board actually had a fairly nice layout and a hidden third button. I only needed one button... and a way to trigger it without a physical press. Using a complicated tool called a "screwdriver-like thingee" I pried the physical button off, leaving nothing but the leads behind.

Instead of sharp metal prongs, I got the ole' trusty soldering iron out and melted the solder enough to pull the leads out. I replaced two of the leads with pins for easy breadboarding.

I have a weird affinity towards MOSFETs. I'm not entirely sure why. I have a feeling that my affinity to using a MOSFET instead of a relay is similar to most people's opinions on using an Arduino instead of a Raspberry Pi. With such snobbery in mind, I prototyped out a circuit that would use an N-channel MOSFET to close the circuit instead of a switch.

Bear in mind I paid no attention in 6.002x, so my circuit has less to do with elegance and common sense as it did with "let's slap together a MOSFET and pull down resistor." Still, sending the 2.2V from a GPIO pin into the MOSFET's gate pin allows the circuit to close on the garage door opener, sending the door up and down.

Next up is adding a surveillance to the Raspberry Pi using a USB camera I found lying around. The plan is to try out the Motion subsystem, then adapt things as needed. One particular enhancement I'm keeping my eye on is the Raspberry Pi Infrared Camera, which I might pair with a set of IR LED's and a fisheye lens. Doing so may require some patching of Motion, but should otherwise be straightforward.

Saturday, June 30, 2012

NVIDIA's Linux Fate

Just like everyone else on the globe, I heard/read/watched Linus telling NVIDIA, in absolutely no uncertain terms, that they were bad Linux citizens. At first I thought Linus was telling them that they were "number one!!!" but sadly this turned out not to be the case.

The topic came up from someone in the audience who was trying to get NVIDIA's Optimus tech working on a Linux notebook. This is a bit of a different bird than NVIDIA's usual discrete GPU market, as this requires co-operation between onboard (or on-die) video adapters, the discrete graphics card and the northbridge to turn off the accelerated GPU when not in use. To my knowledge only Windows 7 drivers can accomplish this, and Linux doesn't quite understand the management architecture to leverage it. The open-source Bumblebee Project appears to be doing a great job of trying to set ACPI & BIOS flags to accomplish the same thing, but the entire effort could be greatly accelerated with NVIDIA's help. While NVIDIA has more-or-less sanctioned the Bumblebee project by releasing installers that work with Bumblebee, they haven't contributed to it directly.

Linux called NVIDIA's lack of Linux support the "exception rather than the rule," and extended that comment to mention that "NVIDIA been one of the worst trouble spots" in kernel support and the "single worst company we've ever dealt with." This of course was punctuated with the infamous line: "so NVIDIA, f**k you." He didn't actually speak in astrisks, I'm just experimenting with censorship.

Linus, of course, just "like[s] being outrageous at times... [because] people who get offended should be offended." It was probably meant to be a thrown gauntlet more than a haymaker, and I can definitely see why. I've been a big advocate of NVIDIA, even with their proprietary stance on GPU drivers and increasingly as the nouveau driver has increased its feature parity. These kind of ACPI hacks however are not the same as keeping tight control over intellectual property tied to their GPU hardware. Given how good drivers are the true value behind discrete graphics cards, I understand not wanting to open-source them to competitors ("Hey AMD! Here's how we did tessalation!"). Controlling power management within the OS kernel is a different matter however - and everyone benefits (including NVIDIA) with broader support. What's the barrier to entry of AMD creating something similar that idled the discrete GPU when no accelerated calls were being made? For that matter, what's to stop Microsoft from coming up with a vendor-agnostic solution that does the same thing? It seems not unlike what OS X Lion is doing right now...

NVIDIA's response basically focused on the fact that they permit Bumblebee to co-exist, their proprietary GPU drivers still offer fantastic performance and support (which they do) and they are one of the largest contributors to Linux on ARM. In short: they don't feel like Optimus Linux support is worth doing right now. However there are signs that even this isn't working well - NVIDIA just lost a quarter million dollar GPU deal due to poor MIPS support.

NVIDIA, this is a great time to step up and contribute the solution to the Linux kernel. Show your competitive edge continues to be broad platform support, otherwise people may meander elsewhere.

Post script: If you're interested in getting a sense of how crazy GPU/graphics driver development is on Linux, read Jasper St. Pierre's post on The Linux Graphics Stack. Terrific outline on the steps a polygon goes through to get to your monitor.

Wednesday, February 29, 2012

Let Cooler Heads Prevail with Security

A long while back I wrote about my attempts with passwordless logins and how, instead of people trying to understand the use case, they attacked me under the auspices of security. This is by no means a new argument... the same brand of venom is spewed on behalf of X11's olde tyme conventions, SysV initialization or LSB compliance. Bear in mind the distribution maintainers themselves actually understand these use cases, but often well-intentioned users assume that the same profiles that work for a server installation should also apply to a kid's laptop.

And then they woke papa bear.

I noticed in my Google+ stream that Linus Torvalds had a similar rant, this time also around network & printer administration. Not only that but the focus of his ire was aimed at openSUSE, the same distribution I alternate ranting and raving about. His arguments were not unlike my own - not everything needs to be locked behind a root password (or even a password for that matter). True, you can circumvent or correct this behavior by changing access levels and permissions, but that can be a hairy proposition. By the time your kids / wife / sales people run across this issue, they're already frustrated and you've lost 'em.

Of course there was backlash... and Linus' parting shot didn't quite help things either. The Register even carried a story about the "tantrum" and interviewed openSUSE director Andreas Jaeger, who admitted Linus' had a valid use case but that ultimately "there are bugs but it's not as simple as [Linus] states."

It kinda is and kinda isn't "as simple." User-level access to print queues should be a doable thing. I believe time zone changes can happen just fine - I tested in KDE and while the system timezone did not change, the time displayed on the desktop switched to US Central just fine. NetworkManager no longer needs administrative access (unless you want it to) and yes, passwordless logins have been working for some time now.

In the end, I understand Linus' frustration but have to say that Ubuntu and Fedora are just as bad. Yes, it would be nice to have CUPS admin normal users as admins, definitely. I can't help but wonder if this angst is due to the Linux desktop being so close, and yet so far away. There are still rough edges to iron out, but for an internationalized effort of distributed engineers coming together to make an open-source desktop OS for the love of the game, things are looking pretty damn peachy.

Monday, November 28, 2011

openSUSE 12.1 - Good Enough to Blog About

I've been away from the blogging scene for over eight months now. My language skills have languished likewise. It seems only fitting that my return to posting is launched on the same topic I departed with.

For too long it seems like openSUSE has been stuck within an odd, "uncanny valley" of user experience and desktop usability. It did so much well that the stuff that worked poorly really stuck out like a sore thumb. I've never really had the problems with YaST that others of my kin seem to decry ("Omigosh, you use SuSE? Ugh, is YaST any better?"), but other issues like poor integration points (e.g. Eclipse) and the banishment of SCPM and SaX2 were frustrating.

openSUSE 11.4 ended up looking okay however had issues with wireless, the noveau driver wasn't ready for prime time and LibreOffice ended up being crashtastic. Luckily (I guess?) I had a hard drive crash right before openSUSE 12.1 launch and was able to start clean when the mirrors sync'd on November 16th. As soon as openSUSE 12.1 launched I grabbed an ISO and began installing on my ThinkPad W510.

Man, what a difference.

First off, the noveau driver is still a bit buggy but has nearly reached parity with the proprietary NVIDIA driver on desktop compositing and UI effects like wobbly windows. I can't tell you how jazzed I was about this lil' facet. Don't get me wrong, I absolutely adore NVIDIA and the work they've done to bring driver support to the Linux desktop. Still, an OSS solution that has native integration into XOrg provides a seamless experience - especially with xrandr and KDE 4. Now KDE (and to a lesser extent, the bootloader) can natively manage resolution, orientation and multiple desktops. I was a bit apprehensive given I frequently switch between projectors, dual-screen setups with larger monitors and road-warrior setups with just the laptop display however noveau and KDE 4 are able to switch between these environments without so much as a mouse click. Plug in a VGA cable and boom - I'm broadcasting a second desktop over the monitor. Sweet.

LibreOffice is much more stable. No huge features I've been able to discern, but then again I'd likely not even notice them given my superficial use of any office suite. Evolution seems a bit smoother and more responsive - hopefully someday soon my office can switch to Exchange 2008 so I can leverage its new SOAP API via Evolution. That should make a big difference over the webdav connectors currently being used.

I've been trying out new features such as brtfs on alternate workstations, since encrypted brtfs partitions are not supported yet. So far it has been quite nice having snapshot capability and b-tree balancing to a file system, especially given how many crazy files I generate or move around.

Still very happy with Digikam; it has become my mainstay for post-production of RAW photos. It somewhat softens the harsh reality that my wife's iPhone 4S take better photos than my Canon DSLR.

All in all, a major tip o' the hat to the openSUSE team on all fronts. Very happy with the usability of the latest release.

Saturday, March 12, 2011

Amazing openSUSE 11.4

First of all, I'll admit that I've waxed gloom-and-doom when talking about openSUSE lately. I'm now saying not only that my worries turned out completely wrong, but openSUSE 11.4 is probably the most amazing OS I've run so far.

I'm not claiming this assertion lightly, either. For the first time in the history of any OS I've ever installed hardware was detected and installed correctly the first time right away. 3D acceleration worked out of the box. My Intel/Broadcomm chipsets functioned immediately without me even having to edit a config file. I dual-boot with ease. All in all, an effortless installation.

Performance increases were immediately evident as well. Apps loaded swiftly, content panes refreshed immediately and window compositing worked fantastically. And in this sprint of performance I found that I didn't need a single drop of proprietary software. The open nouveau driver for NVIDIA GPUs now has sufficient 3D support to provide desktop effects such as transparency, and Broadcomm wireless chipsets are now supported within the latest kernel. No joke! Package management is many, MANY times faster now due to more simple and more concurrent HTTP operations. Updates and package installation is in a whole new league now, and wins hands-down over any other distro (including Windows).

But wait! There's more! openSUSE 11.4 also is the first distro with Firefox 4.0 and LibreOffice, giving me the freshest builds of two suites I use frequently. Evolution has been updated so that IMAP operations are non-blocking (oh thank the heavens) which makes it appear much faster as well.

Reading down the list of openSUSE 11.4 product highlights is like looking at my own personal want list for a Linux desktop. If the coming work week goes as smoothly as the past couple of days have, this will be the distro to beat all distros. I even find myself wanting to use openSUSE 11.4 over Windows 7 for random tasks at home, simply because the user interface is much more elegant and flexible.

I owe openSUSE 11.4 so much that I've finally given up on typing the distro as "OpenSuSE" in homage to the original distribution. SuSE has now grown up and is now truly a fantastic product of the open distro's team - and is now truly openSUSE in its own right.

Saturday, July 17, 2010

openSuSE 11.3 - And The Rage Returns

I really want to love openSuSE. I really, truly do. Things were going so well between us... I was very happy with openSuSE 11.2, so much so that I installed 11.3 the same day it dropped. Things looked even more polished - no missing icons, no segfaults, everything operated cleanly and worked well. I went to install my favorite SuSE applications... and they simply weren't there anymore.

First let's discuss SaX2. I love SaX2 and how it makes XOrg configuration so automagic. Yet SaX2 is no longer provided with SuSE distributions. The openSuSE team did announce that this was happening, supposedly because "automatic configuration and dynamic reconfiguration mechanisms have been developed such that today the tasks that SaX2 was able to do are done fully automatically on the fly and can be modified from within a desktop session." They might have a point... I do use nivida-settings more than SaX2 now. Oh well... I'm willing to let it go.

However one thing I wasn't able to let go of is SCPM. It went missing without so much as a trace and a profile management package can't be found in any repo for openSuSE 11.3. This was a major product differentiators for ALL SuSE distros, and for it to be missing is a huge shame. Now it is even harder for me to switch between configuration profiles for presentations/home/work, as they take wildly different network configurations, display configurations, peripheral configurations, printer configs, on and on and on... The omission of SCPM is pretty grave.

I went to find solace in my Really Slick Screensavers. I added my missing KDE4 screensaver entries and expected them to work as they always have. Then I ran across yet another omission - the KDE xscreensaver compatibility applications were missing as well. This omission was even more curious, as they are missing in the binary packages but are present in the source packages. I re-built the RPM from source, re-installed it and the xscreensaver compatibility layer appeared. Odd... and now I'll have to re-do that step with every patch & upgrade.

I don't know what to think of 11.3 yet. On one had it works extremely well and the longer release cycle appears to have served them well. Still, I can't help but feel that some things were omitted to simplify the packaging of the distribution... and that could be a bad omen of things to come.

Saturday, April 10, 2010

So Many Cores, So Little Time

My new work laptop is a ThinkPad W510... a Core i7 Q 720 at 1.6GHz. It has four hyperthreaded cores which /proc/cpuinfo allows me to monitor as eight... meaning my system monitor looks awesome.

Now I'm at the bleeding edge (I guess) of hardware, as now everything requires the latest drivers. I had to manually acquire the firmware for my wireless NIC from Intel directly, then build the Linux wireless drivers from source and install them. Luckily the process was surprisingly easy... it was just that I had to track down and download kernel sources, the GCC build chain, firmware and the wireless driver package without Internet access on the laptop. Still, once that was done the Linux wireless source configure/build/install was quick and easy.

I also had to go directly to NVIDIA's beta driver portal and get the very latest binary drivers for the GPU as well... the console itself was being corrupted by display errors. Again, not hard to fix, just another step.

In the age of everything "just working" on Linux distros I was glad to see that the ancient art of configure/make/make install is still being practiced... in fact it works better than ever.

Thursday, December 10, 2009

Passwordless Login Haters

Password-less logins via an X11 login manager has always been a misunderstood topic. Just search for "passwordless xdm" and you'll see tons of flamewars started by someone innocently asking how to allow a user to login to KDE or Gnome without having to remember a password. Without fail, a number of people will decry the very thought and deem those in question complete idiots who subvert the very laws of nature, security and well-being. I was involved in such a discussion a while back on a newsgroup, and the result was pretty typical. Instead of saying "I don't know" the poster derided my efforts and said this was the biggest security hole ever invented since... the hole... or something. After explaining what a kiosk was the thread devolved into my posting etiquette. Point and match, sir.

When it comes down to it people don't understand Linux' password authentication mechanism. The PAM subsystem allows for a number of profiles based on who is requesting authentication and authorization. SSH, FTP and yes KDE/Gnome login managers all have different authentication profiles that determine how and when a user is authenticated.

Allowing a two year old to just click on her face in the KDE login screen doesn't open unbridled access to everyone in the world. If you've disabled remote X11 logins, turned off X11 tunneling via SSH and bolted down remote access then only local users physically at the keyboard will able to login without a password. If that same username tried to SSH in to the box they would be greeted with a password, since the passwordless authentication only applies to KDE's login manager.

One could breech the KDE login manager for access by this user, but that's a whole other story. Ultimately what people don't understand is just because a username doesn't need a password to authenticate on a local desktop session that doesn't mean the username will never need a password to authenticate via any means available.

Enough of that tho. Ultimately I'm getting on this soapbox because I had to alter openSuSE 11.2 to properly allow me to have per-user passwordless logins via KDM. With a stock openSuSE 11.2 install you have two choices for their desktop managers: you either require passwords for everyone or you grant passwordless logins to everyone. In my kiosk I just need a couple of low-privilege users to be passwordless; the rest require logins.

Something SuSE has always loved to do is override configuration files with scripts that freshly parse settings from /etc/sysconfig every time they're used. In this instance SuSE runs the script /usr/share/kde4/apps/kdm/read_sysconfig.sh every time it starts the KDE desktop manager, wiping out old configurations and procedurally generating new ones. Even if you know what config file to change it doesn't do you much good - it will get wiped out when KDM starts. On top of that the default /etc/sysconfig/displaymanager value for passwordless logins (DISPLAYMANAGER_PASSWORD_LESS_LOGIN) is just true or false... you can't set an arbitrary user.

I modified /etc/sysconfig/displaymanager to accept more than just a yesno value... instead I told it to accept an arbitrary string. Next I modified /usr/share/kde4/apps/kdm/read_sysconfig.sh to see if the DISPLAYMANAGER_PASSWORD_LESS_LOGIN string was set to "no." If it was, don't enable passwordless logins at all. If it was not, enable passwordless logins and allocate the string to be the list of users that have password-less logins.

The modification was minor - it was just altering:

if [ "$DISPLAYMANAGER_PASSWORD_LESS_LOGIN" = "yes" ]; then
echo "NoPassEnable=true"
echo "NoPassAllUsers=true"
else
echo "NoPassEnable=false"
echo "NoPassAllUsers=false"
fi

to be:

if [ "$DISPLAYMANAGER_PASSWORD_LESS_LOGIN" = "no" ]; then
echo "NoPassEnable=false"
echo "NoPassAllUsers=false"
else
echo "NoPassEnable=true"
echo "NoPassUsers=$DISPLAYMANAGER_PASSWORD_LESS_LOGIN"
fi


in /usr/share/kde4/apps/kdm/read_sysconfig.sh.

Now I have passwordless logins and still retain security... despite what others may think.

Tuesday, November 17, 2009

openSuSE 11.2 (No I Will Not Spell It Their Way)

I installed openSuSE 11.2 at the beginning of this week and am glad to finally be done with unsupported KDE 4.x packages. Installation took much less time than previous incarnations, and boot time, shutdown time and suspend time is ridiculously faster.

One exceedingly nice item is that a native KDE 4 Network Manager is finally included with the distro. Setting up a wireless connection was just fine once I got the necessary firmware installed for my wlan adapter and VPN connections were managed correctly for the first time in a long time. Remote routes specified by the VPN concentrator were applied (w00t!) and negotiation took only one or two seconds.

Packages are stable and fairly seamless - moving in to this install has also taken much less time than previous versions.

Fonts scale particularly well. Finally 96dpi is obeyed on my monitor and both GTK and Qt apps look fantabulous.

Things are painless, stable and work out-of-the-box. openSuSE 11.0 was not without hitches but worked great overall - and openSuSE 11.2 is great with no compromises.